 PoseToki
PoseToki · Drawing guide
One-minute balance: connect pelvis and supporting foot
When a standing figure feels unstable, inspect where its weight appears to land before fixing the head size. Pose PT001 shows how a still stance can contain subtle tilts. Compare the shoulders, pelvis, and both feet before outlining the clothes.
Updated October 2, 2026
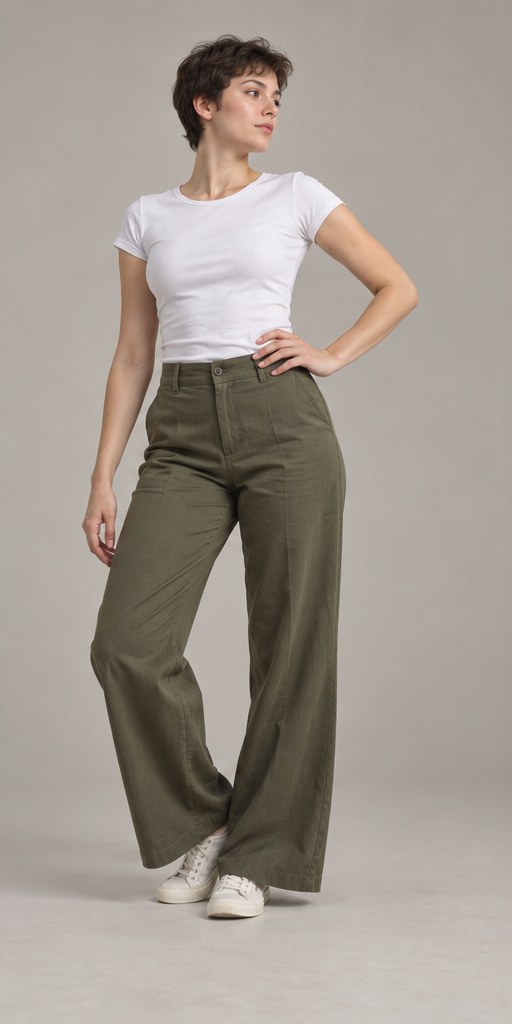
Three points to find before drawing
- Lightly mark the line joining the shoulders. A tilted head does not automatically mean the shoulders have the same angle.
- Compare the height of the two sides of the waist and the trouser waistband to estimate pelvic tilt. Avoid locking the torso into one rectangle.
- Mark where both shoes meet the floor. Use their placement and the torso axis to infer which leg appears to carry more of the weight.
These reference photos were generated for PoseToki with AI. Use them to practice observation, not as anatomical ground truth.
Draw the same pose at three speeds
- 30 seconds
Place four points: head, pelvis, and two feet. Draw from pelvis toward the apparent supporting foot; leave the outline open.
- 1 minute
Add shoulder and pelvic lines and compare their angles. Give the supporting leg a firmer line and the balancing leg a lighter one.
- 3 minutes
Add rib-cage volume, knee direction, and shoe contact surfaces. Finally, imagine a vertical line dropped from the upper body and see where it reaches the floor.
A common mistake—and a correction
Two legs drawn as equally thick, equally loaded pillars make a stance rigid. Treat one as the likely weight-bearing axis and the other as a balancing axis. A photo cannot reveal exact pressure, so this is an observation-based hypothesis to make visually convincing, not a measured biomechanical claim.
Transfer the idea to another pose
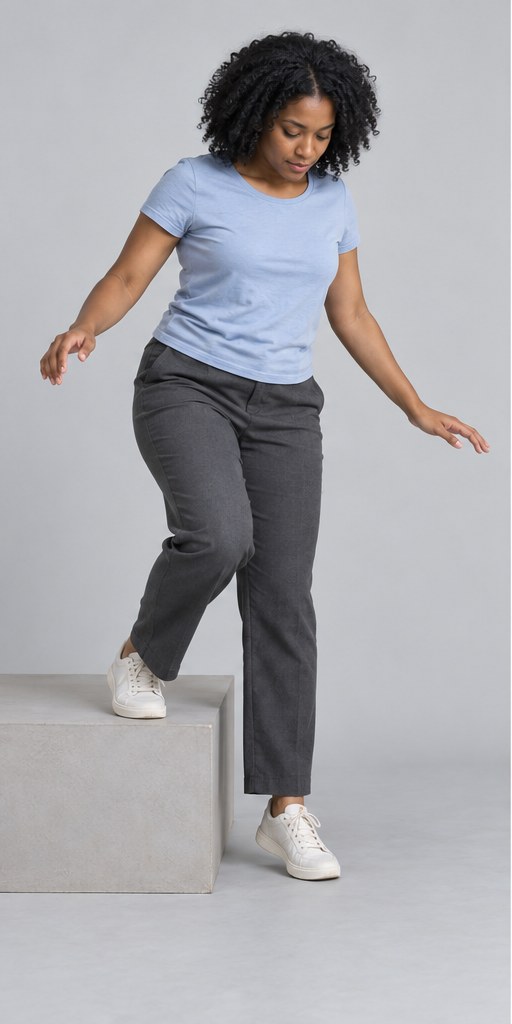
Mark the floor and top of the block as two horizontal lines at different heights. Do not force the legs to look equal when connecting the block foot to the floor foot; observe which way each knee folds. For a comic panel, hide the block briefly and ask whether the figure still reads as stepping to a higher level.
Questions for your review
- Do the foot-to-floor contacts match the reference?
- Did you make shoulder and pelvic lines parallel by habit?
- Does a vertical line from the upper body reach a plausible support area?
Try it in the studio
Choose 1 minute and 5 poses in the studio. Mark both foot contacts first on every sheet. Review the first set only for support and tilt; refine leg lengths in a second set.
Start a pose session →